Mastering Docker Desktop: A Step-by-Step Guide for Setting Up Local Environments
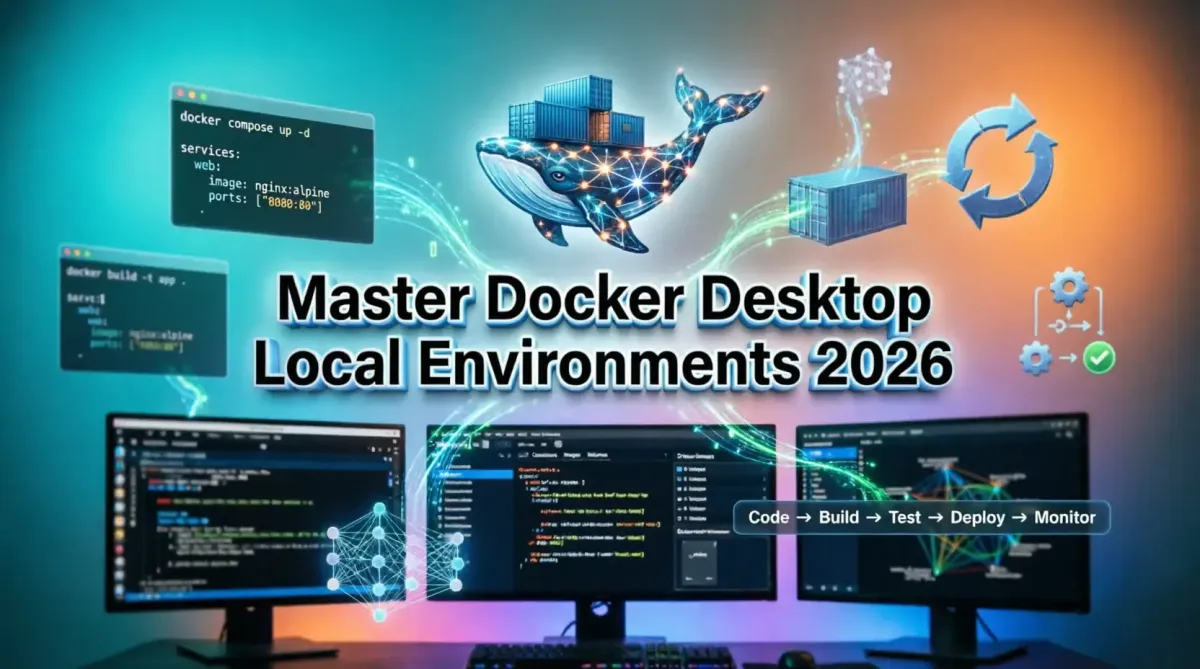
In the modern software development landscape of 2026, the infamous "it works on my machine" problem has been virtually eradicated, thanks to the universal adoption of containerization. At the heart of this local development revolution is Docker Desktop, a powerful, cross-platform application that provides a seamless graphical interface and robust backend for building, sharing, and running containerized applications. Whether you are spinning up a complex microservices architecture, testing a multi-database backend, or self-hosting personal productivity tools, Docker Desktop is the foundational layer of your local infrastructure. This comprehensive, step-by-step guide will walk you through mastering Docker Desktop, from optimizing its underlying virtualization architecture and managing resource allocation to building advanced multi-container stacks with Docker Compose. By the end of this guide, you will have a highly optimized, standardized, and reproducible local development environment that accelerates your workflow and ensures perfect parity with your production deployments.
Understanding Docker Desktop Architecture in 2026
Unlike the Docker Engine which runs natively on Linux, Docker Desktop operates on macOS and Windows by utilizing lightweight, optimized virtualization layers to host the Linux kernel required for containers. In 2026, the architecture has matured significantly, offering near-native performance and deep OS integration.
Windows: The WSL2 Backend
On Windows, Docker Desktop relies entirely on the Windows Subsystem for Linux 2 (WSL2). WSL2 runs a real Linux kernel inside a highly optimized utility VM. This architecture provides massive I/O performance improvements over the legacy Hyper-V backend and allows Docker to seamlessly access the Windows file system. For developers choosing their daily driver, understanding the nuances of these ecosystems is critical; our guide on Mac vs Windows for developers which OS is better in 2026 breaks down how container performance factors into the broader OS decision.
macOS: The Apple Virtualization Framework
For Apple Silicon (M-series) and modern Intel Macs, Docker Desktop utilizes Apple's Virtualization.framework. This provides hardware-accelerated virtualization, resulting in faster boot times, lower memory overhead, and native ARM64 container execution.
While Docker Desktop is the undisputed king of local development, it is important to understand where it fits in the broader orchestration landscape. While you use Docker Desktop to build and test locally, understanding comparing Docker vs Kubernetes which one do you need will help you map your local Compose files to production-grade Kubernetes manifests.
Step 1: Installation and Initial Configuration
Proper installation sets the foundation for a frictionless Docker experience.
- Download and Install: Download the latest installer from the official Docker website. Ensure your OS is up to date to support the latest virtualization features.
- Enable Virtualization in BIOS/UEFI: On Windows, ensure Intel VT-x or AMD-V is enabled in your BIOS. On macOS, virtualization is enabled by default.
- WSL2 Setup (Windows Only): During installation, Docker Desktop will prompt you to install or update WSL2. Accept this prompt. Open PowerShell as Administrator and run
wsl --installto ensure the default Linux distribution (usually Ubuntu) is initialized. - Account and Telemetry: Sign in with your Docker Hub account to access public repositories and manage rate limits. For enterprise users, sign in with your Docker Business SSO credentials to enforce organizational security policies.
Step 2: Optimizing Resource Allocation and Performance
Docker Desktop can be resource-hungry if left on its default settings. Tuning these parameters is essential for maintaining a responsive host machine while running heavy local stacks.
Accessing the Settings:
Click the Docker icon in your system tray/menu bar and select the gear icon to open the Dashboard Settings.
Resource Allocation (Mac & Legacy Windows):
- CPUs: Allocate 50-75% of your total physical cores. Leaving at least 2 cores for the host OS prevents system-wide stuttering.
- Memory (RAM): Allocate 4GB to 8GB for standard web development. If you are running local LLMs or heavy data processing stacks, allocate up to 75% of your total RAM.
- Swap: Set to 1GB to prevent the Docker VM from crashing during memory spikes, but keep it low to avoid severe performance degradation.
WSL2 Integration (Windows):
If you are using the WSL2 backend, resource limits are not set in the Docker Desktop GUI. Instead, you must create a .wslconfig file in your Windows user directory (C:\Users\):
[wsl2]
memory=8GB
processors=4
swap=2GB
localhostForwarding=true
After saving, restart WSL by running wsl --shutdown in PowerShell.
Disk Image Management:
Docker images, containers, and volumes consume massive amounts of disk space over time. The virtual disk file (ext4.vhdx on Windows, or the raw image on Mac) grows dynamically but does not automatically shrink when you delete containers. To reclaim space, regularly use the "Clean / Purge data" option in the Docker Desktop Troubleshoot menu, or run docker system prune -a --volumes in your terminal. For a broader approach to maintaining your machine's health, reviewing how to safely clean up your system storage on Mac and Windows provides essential strategies for managing large, hidden developer files.
Step 3: Building Your First Multi-Container Local Stack
Modern applications are rarely monolithic. You typically need a web server, a database, a cache, and perhaps a background worker. Docker Compose, built directly into Docker Desktop, allows you to define and run these multi-container setups using a single YAML file.
Example: A Modern Web App Stack
Create a file named docker-compose.yml in your project root:
version: '3.9'
services:
  web:
    image: node:20-alpine
    ports:
      - "3000:3000"
    volumes:
      - .:/app
      - /app/node_modules
    working_dir: /app
    command: npm run dev
    environment:
      - DATABASE_URL=postgres://user:password@db:5432/mydb
    depends_on:
      - db
      - redis

  db:
    image: postgres:16-alpine
    environment:
      POSTGRES_USER: user
      POSTGRES_PASSWORD: password
      POSTGRES_DB: mydb
    volumes:
      - postgres_data:/var/lib/postgresql/data
    ports:
      - "5432:5432"

  redis:
    image: redis:7-alpine
    ports:
      - "6379:6379"

volumes:
  postgres_data:
Run docker compose up -d to start the stack in detached mode. Docker Desktop will pull the images, create an isolated network, and start the containers. Whether you are building a high-performance API with Laravel 11 and Octane or a modern React frontend, this Compose pattern remains the universal standard for local environment parity.
Step 4: Volume Mapping and Hot-Reloading
One of the most critical concepts in local Docker development is how to handle file changes. If you bake your code into the Docker image, you would have to rebuild the image every time you save a file. Instead, we use bind mounts.
Bind Mounts vs. Named Volumes:
- Bind Mounts (
./src:/app/src): Maps a directory on your host machine directly into the container. When you edit a file in your IDE, the container sees the change instantly. This is mandatory for local development hot-reloading. - Named Volumes (
postgres_data:/var/lib/postgresql/data): Managed entirely by Docker. Used for persistent data that should survive container destruction, like database records. You should not use bind mounts for database data directories, as file system permission mismatches between host and container can corrupt the database.
The Node Modules Trap:
In the Compose example above, notice the line - /app/node_modules. This is an anonymous volume. Because your host machine (e.g., Windows/macOS) and the Linux container have different binary architectures for compiled dependencies, you must tell Docker to ignore the host's node_modules folder and use the one generated inside the container during the build process. This ensures your framework's hot-reloader functions correctly, which is especially vital when working with frameworks like Next.js 15 where file-watching accuracy is paramount.
Step 5: Networking and Service Discovery
Docker Desktop automatically creates a bridge network for your Compose projects. Containers within the same Compose file can communicate with each other using their service names as DNS hostnames.
Key Networking Concepts:
- Port Mapping (
ports: "8080:80"): Maps port 8080 on your localhost to port 80 inside the container. This allows you to access the app viahttp://localhost:8080in your host browser. - Internal DNS: In the Compose example, the
webservice connects to the database using the hostnamedb, notlocalhost.localhostinside the container refers to the container itself, not your host machine. - Host Networking: If a container needs to access a service running directly on your host machine (like a local mock API), it must connect to the special DNS name
host.docker.internal.
Step 6: Integrating with Your IDE and CI/CD
Docker Desktop is not just a runtime; it is a development platform. Integrating it with your toolchain creates a seamless, standardized workflow.
Dev Containers (VS Code / Cursor):
The "Dev Containers" extension allows you to use a Docker container as your full-featured development environment. By adding a .devcontainer/devcontainer.json file to your repository, your IDE will automatically spin up the exact OS, language runtimes, and CLI tools required for the project. When paired with the right setup, as detailed in our comprehensive guide to choosing the best IDE for your project, Dev Containers ensure that every developer on the team has an identical environment down to the exact library versions.
Standardizing Remote Teams:
By committing your docker-compose.yml and .devcontainer configurations to version control, you eliminate onboarding friction. A new hire simply clones the repo and runs one command. This level of standardization is a cornerstone of effective collaboration, especially when leveraging top 5 SaaS platforms for managing global remote teams to coordinate asynchronous engineering efforts across time zones.
Step 7: Security and Vulnerability Scanning
Running containers locally does not mean you can ignore security. A compromised local container can be a pivot point for attackers to access your host machine or corporate network.
Docker Scout and Image Scanning:
Docker Desktop includes Docker Scout, a tool that analyzes your container images for known CVEs (Common Vulnerabilities and Exposures). Before pushing an image to a registry, run docker scout cves <image_name> to identify and patch vulnerable dependencies.
Non-Root Users:
By default, processes inside a container run as the root user. If an attacker escapes the container, they have root privileges. Always configure your Dockerfiles to create and switch to a non-root user:
RUN addgroup -S appgroup && adduser -S appuser -G appgroup
USER appuser
Securing your local development environment is the first line of defense in your broader security posture. Implementing these containerization best practices aligns with strategies for protecting your small business from ransomware attacks, ensuring that local vulnerabilities do not become enterprise liabilities.
Step 8: Docker Desktop Extensions and Ecosystem
Docker Desktop features an Extensions marketplace that allows you to add third-party tools directly into the Docker Dashboard UI.
Essential Extensions for 2026:
- Disk Usage Visualizer: Provides a graphical breakdown of which images, containers, and volumes are consuming your virtual disk space.
- Logs Explorer: Aggregates and searches logs across all running containers in a single, filterable UI.
- Resource Saver Mode: Automatically pauses inactive containers after 5 minutes, drastically reducing CPU and RAM usage on laptops to preserve battery life.
If you are using Docker Desktop to run self-hosted applications for your business or personal use, such as self-hosting your own cloud using Nextcloud, these extensions make managing long-running background services significantly easier.
Troubleshooting Common Docker Desktop Issues
Even with a perfect setup, developers encounter edge cases. Here is how to resolve the most common Docker Desktop issues.
Issue 1: "No space left on device"
Cause: The virtual disk file has reached its maximum allocated size, or the underlying host drive is full.
Fix: Run docker system prune -a --volumes to remove dangling images and unused volumes. On Windows, if the ext4.vhdx file is still massive, you must manually compact it using the diskpart utility or the Docker Desktop "Clean / Purge data" tool.
Issue 2: High CPU Usage by "Vmmem" or "WSL" Process
Cause: A container is stuck in an infinite loop, or the Linux VM is performing heavy memory paging due to insufficient RAM allocation.
Fix: Check docker stats to identify the offending container. Restart the WSL backend via PowerShell: wsl --shutdown, then restart Docker Desktop.
Issue 3: Port Already in Use
Cause: Another application on your host machine, or a zombie Docker container, is already bound to the required port (e.g., port 80 or 5432).
Fix: Run docker ps to find and stop the conflicting container. On Windows, use netstat -ano | findstr :<port> to identify and kill the host process.
Docker Desktop vs. The Alternatives
While Docker Desktop is the industry standard, the open-source community has developed robust alternatives, particularly for developers who want to avoid Docker's commercial licensing terms for large enterprises.
- Podman Desktop: A daemonless, rootless alternative that is fully compatible with Docker CLI commands and Compose files. It is highly favored in security-conscious environments.
- Rancher Desktop: Offers the ability to run either containerd or dockerd as the container runtime, and includes built-in Kubernetes management.
- Colima: A lightweight, CLI-only container runtime for macOS and Linux that uses Lima to provision the VM, favored by developers who prefer terminal-only workflows.
When evaluating these tools, it is helpful to view them through the lens of broader infrastructure choices, much like evaluating SaaS vs self-hosted for data privacy and control. Docker Desktop offers convenience and enterprise support, while alternatives offer granular control and open-source purity.
Future-Proofing Your Local Environment
As we move further into 2026, local development environments are becoming increasingly complex, incorporating AI model inference, edge computing simulations, and multi-architecture builds (ARM64 vs AMD64).
Multi-Architecture Builds:
With the dominance of Apple Silicon and AWS Graviton processors, building images that run natively on ARM64 is mandatory. Docker Desktop integrates with Docker Buildx, allowing you to easily build and push multi-architecture manifests:
docker buildx build --platform linux/amd64,linux/arm64 -t myapp:latest --push .Local AI and NPU Integration:
Developers are now running local LLMs and AI inference engines inside containers. Docker Desktop is actively working on exposing host-level NPU (Neural Processing Unit) and GPU passthrough to containers, allowing local AI models to run at near-native speeds without complex driver installations inside the container image.
Conclusion: The Foundation of Modern Development
Mastering Docker Desktop is no longer an optional skill for software engineers; it is a fundamental requirement. By understanding the underlying virtualization architecture, optimizing resource allocation, and leveraging Docker Compose for multi-container orchestration, you create a local development environment that is fast, reliable, and perfectly mirrored to production.
The shift from manual environment setup to declarative, containerized workflows has permanently elevated the baseline of software quality. It eliminates configuration drift, accelerates onboarding, and empowers developers to experiment fearlessly, knowing that a simple docker compose down -v can instantly reset their world to a clean state.
Take the time to configure your Docker Desktop settings, build robust Compose files, and integrate your IDE with Dev Containers. The initial investment in mastering these tools will pay dividends in saved time, reduced frustration, and accelerated delivery for years to come. Your local environment is the forge where your software is crafted; ensure it is optimized for peak performance.